
Getting started with the macOS SDK (Objective-C)
Adding Superpowered to your project
First, download the Superpowered C++ SDK from here. Add the Superpowered/ folder to a new folder called libs at the root of your project.
Now we have the library files in place, we then import the the following libraries:
- AudioToolbox (external)
- AudioUnit (external)
- CoreAudio (external)
- And finally, our Superpowered single multi-target "xcframework"
The "M" processor architecture adds another 64-bit ARM target next to the already present iOS one, therefore bundling multiple targets into a single .lib file is not possible. All Superpowered static libraries are packaged into a single multi-target "xcframework", which is a convenient drag-and-drop way to include all Superpowered binaries in an Xcode project.
Navigate to the General tab of your project settings and find the add button under Frameworks, Libraries and Embedded Content.
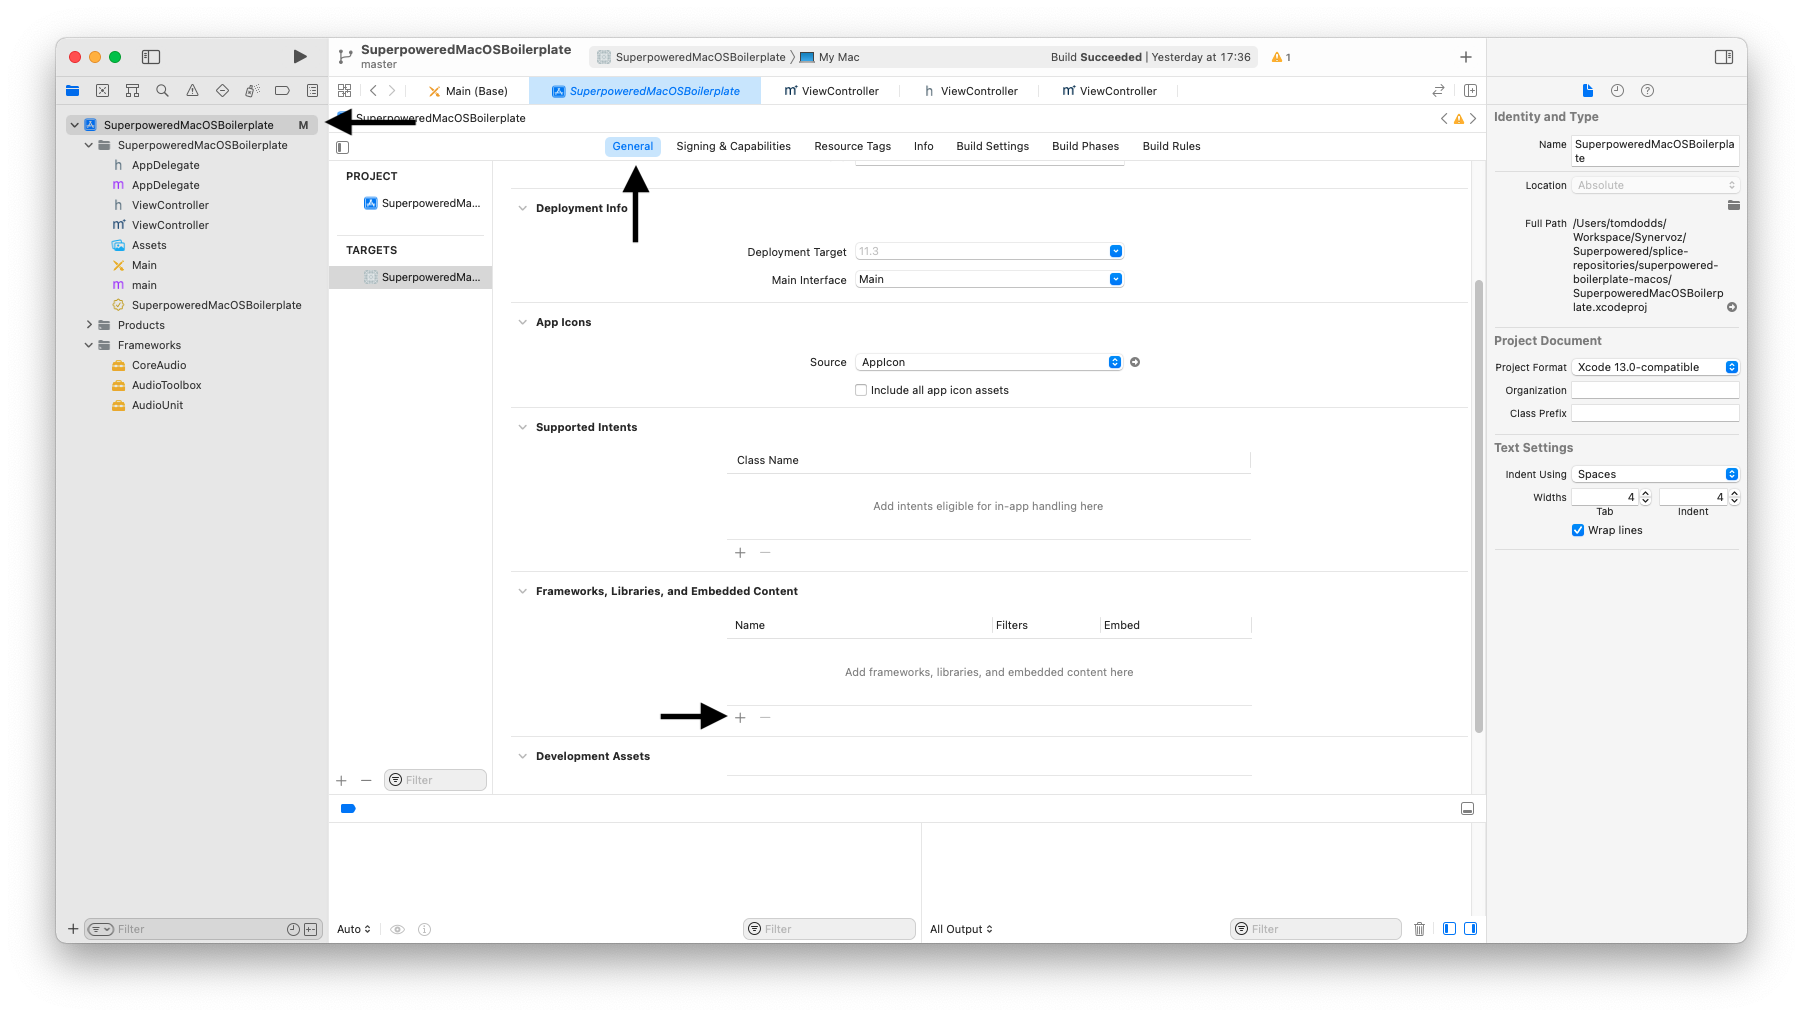
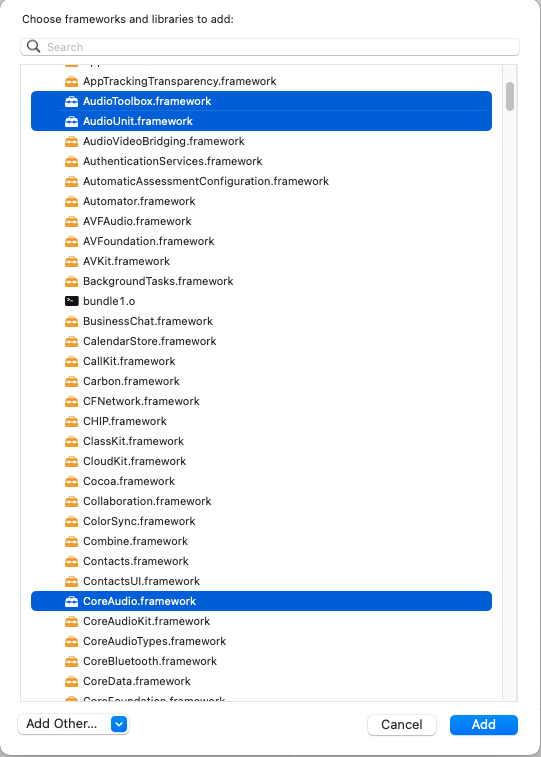
Add the first three external libraries first.
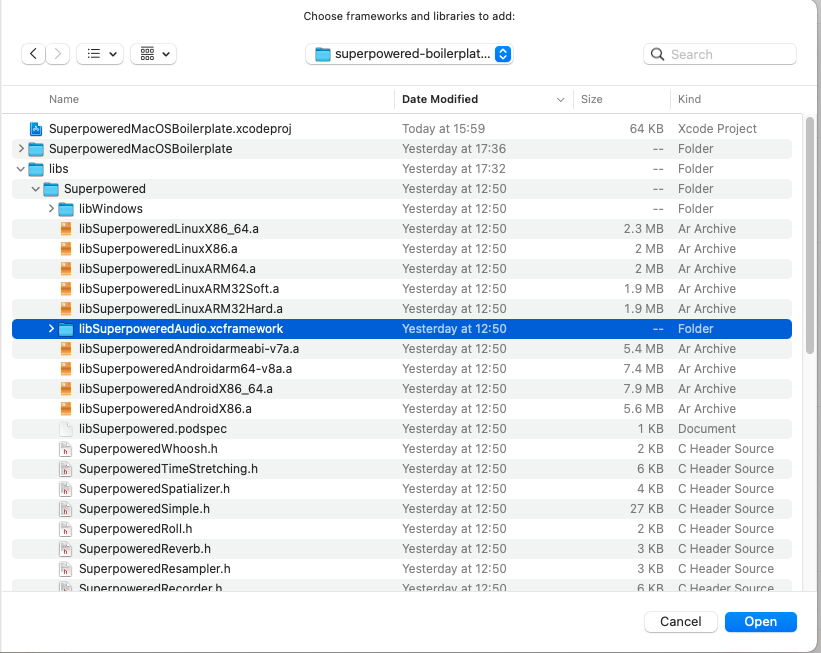
Then repeat the process to add the Superpowered library by selecting Add Other at the bottom and then choose Add files and locate the lib/Superpowered/libSuperpoweredAudio.xcframework folder then select.
Once added, make sure the embed settings are set to Do Not Embed.
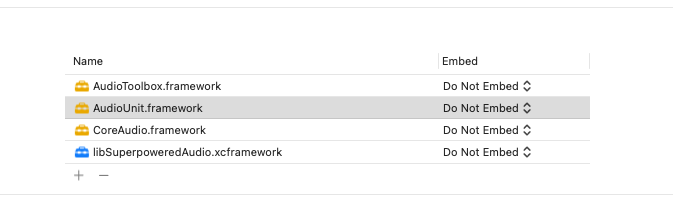
Finally, ensure that all four libraries are included in your package, for example AudioToolbox:

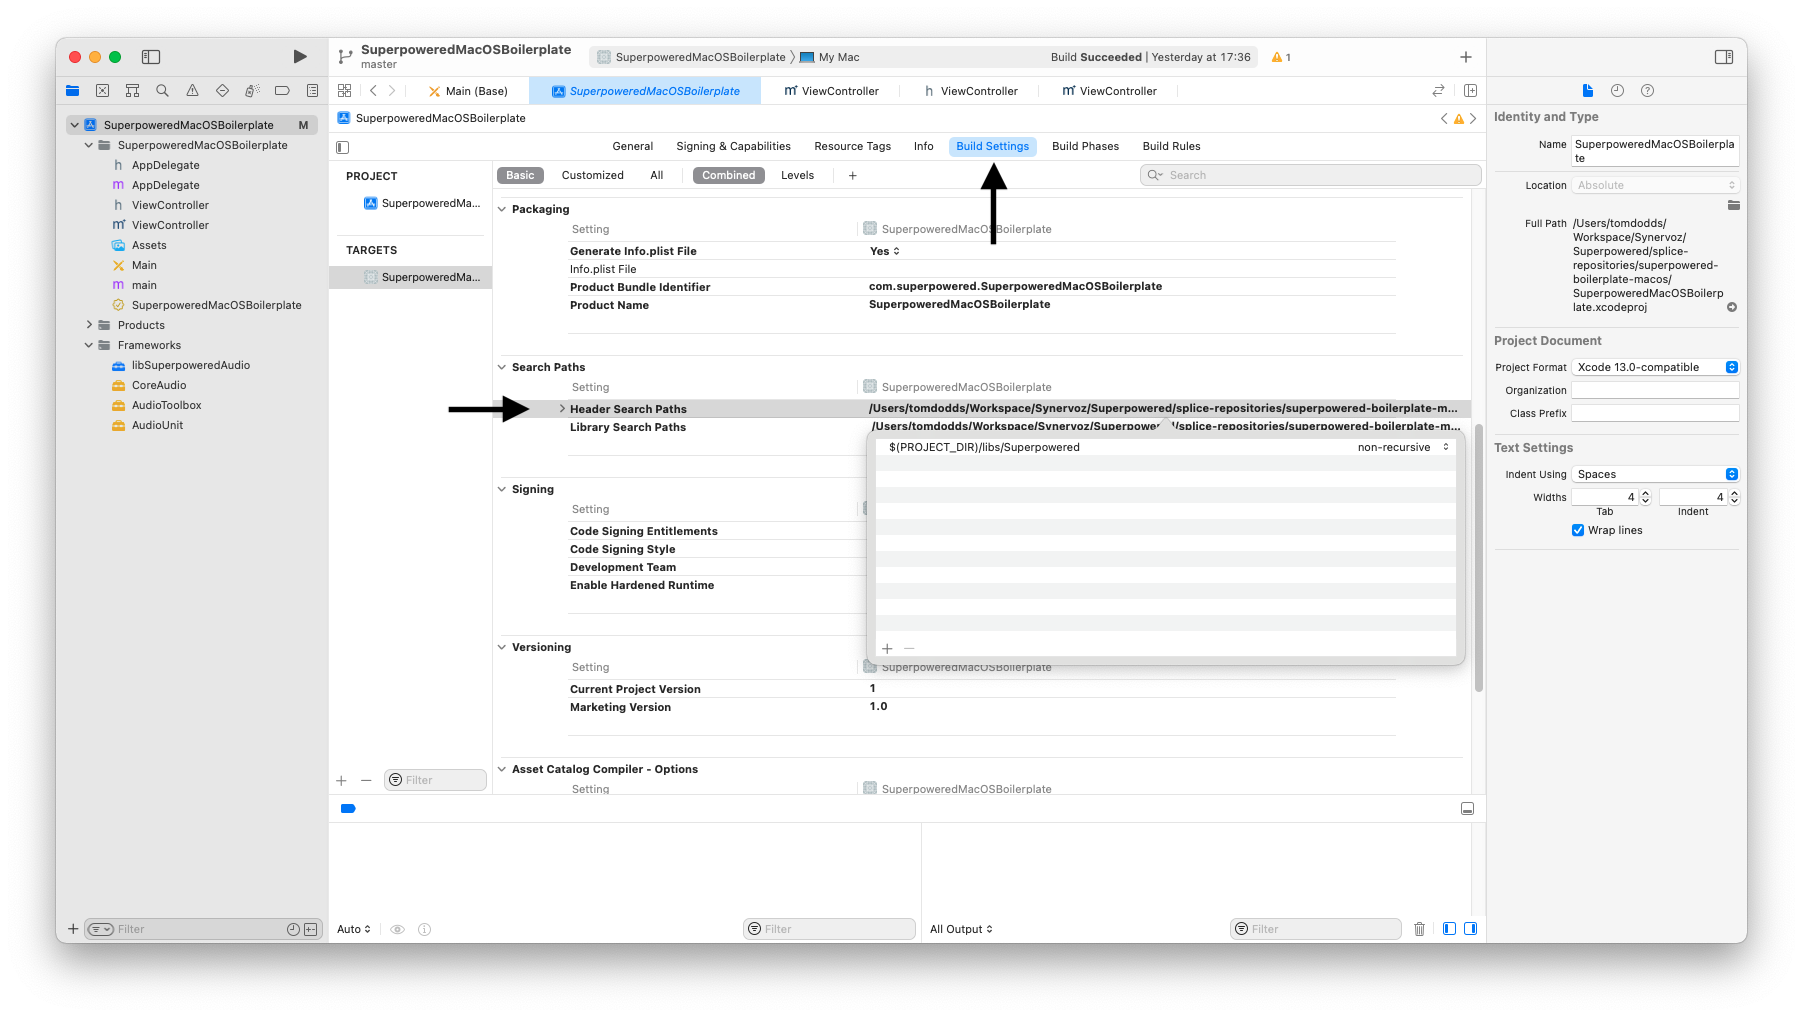
Next, we need to add the path of the Superpowered headers location to the Header Search Paths setting over in the Build Settings tab. Add $(PROJECT_DIR)/libs/Superpowered.
Microphone permission
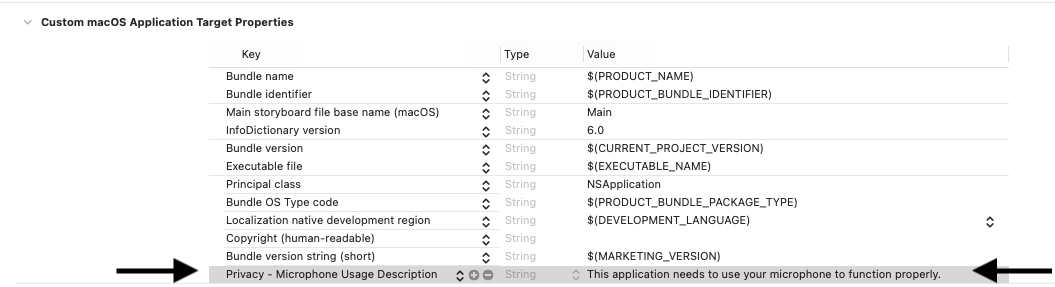
If you are planning to use a device's microphone or any audio input, you'll also need to make sure to set the NSMicrophoneUsageDescription value in your Info.plist file. This will show a prompt to the user when the app is run for the first time which displays a custom message you can define. This can be done manually or through the Xcode UI.
Select Privacy - Microphone Usage Description
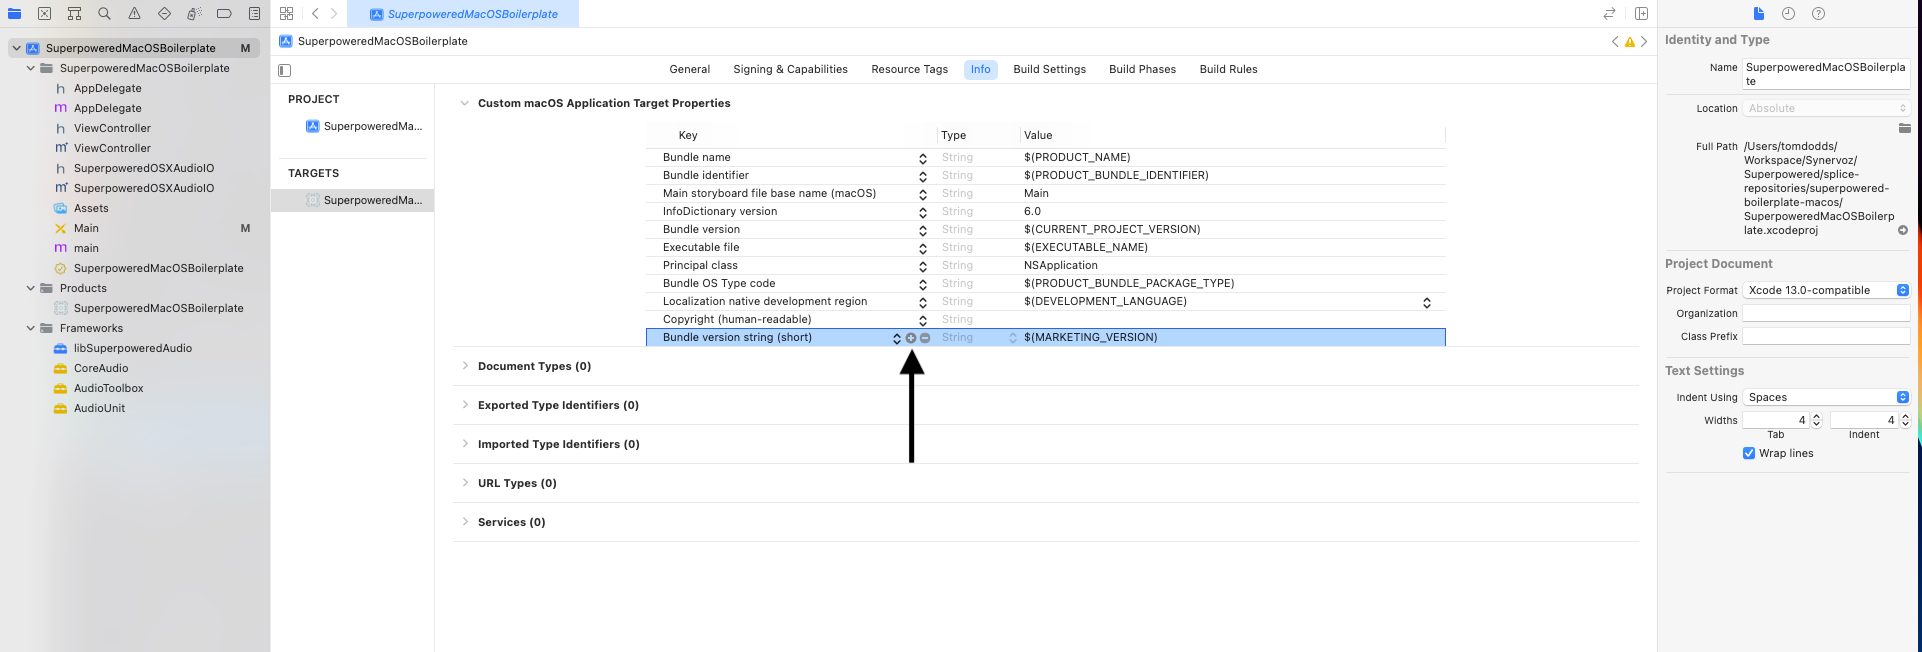
Then provide the text you'd like to be shown when the user is asked permission.
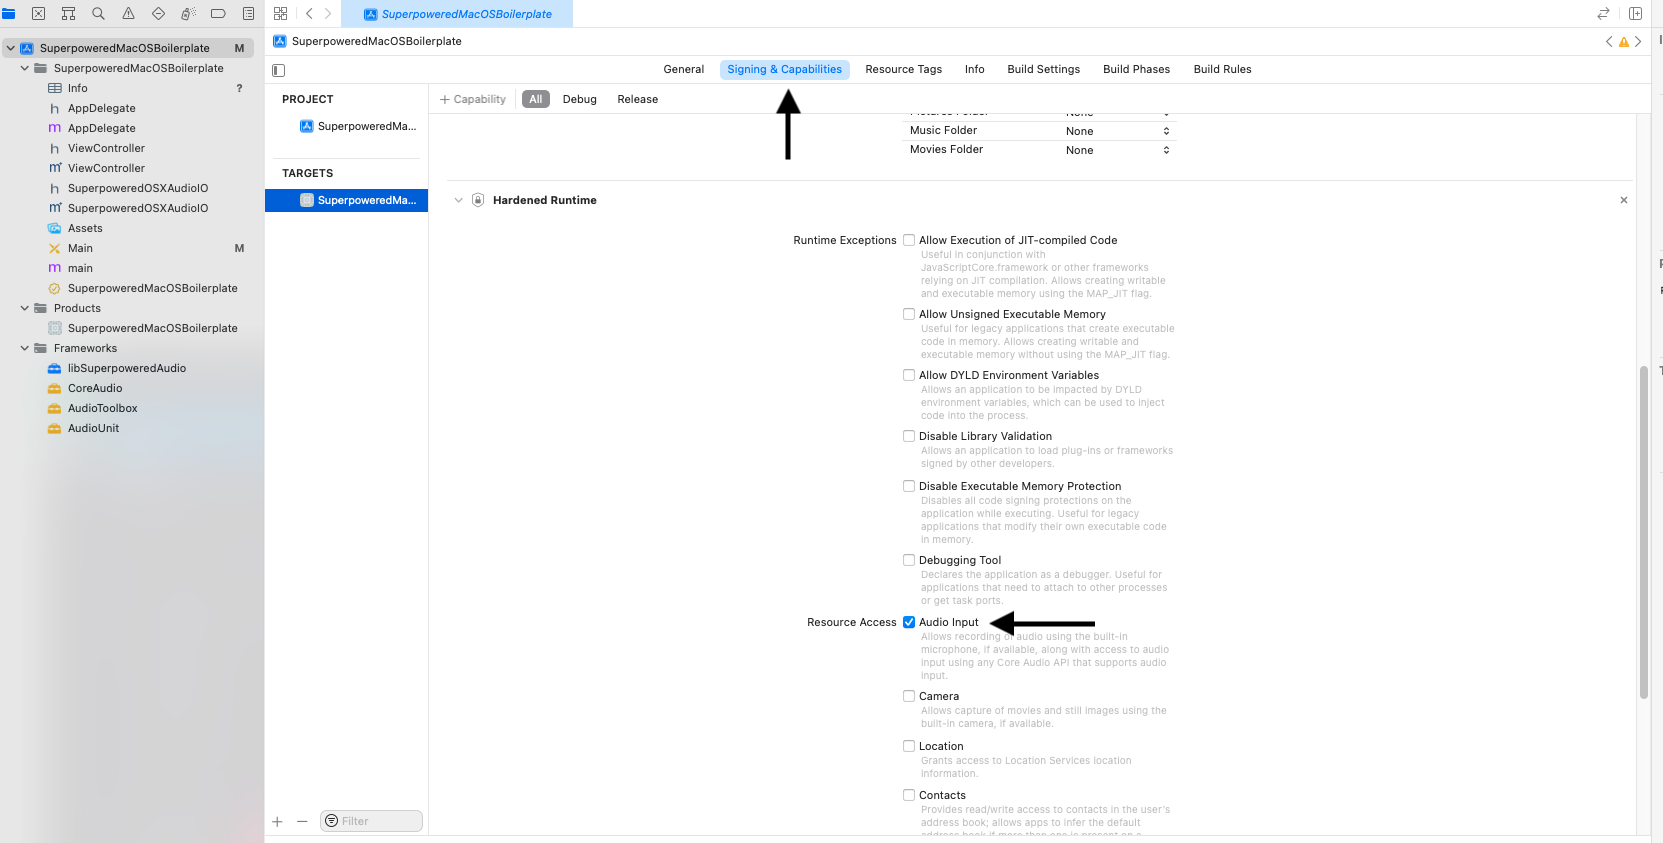
On OS X, we'll also need to grant microphone access to the application sandbox and runtime. Under File->Project ensure these two boxes are ticked.
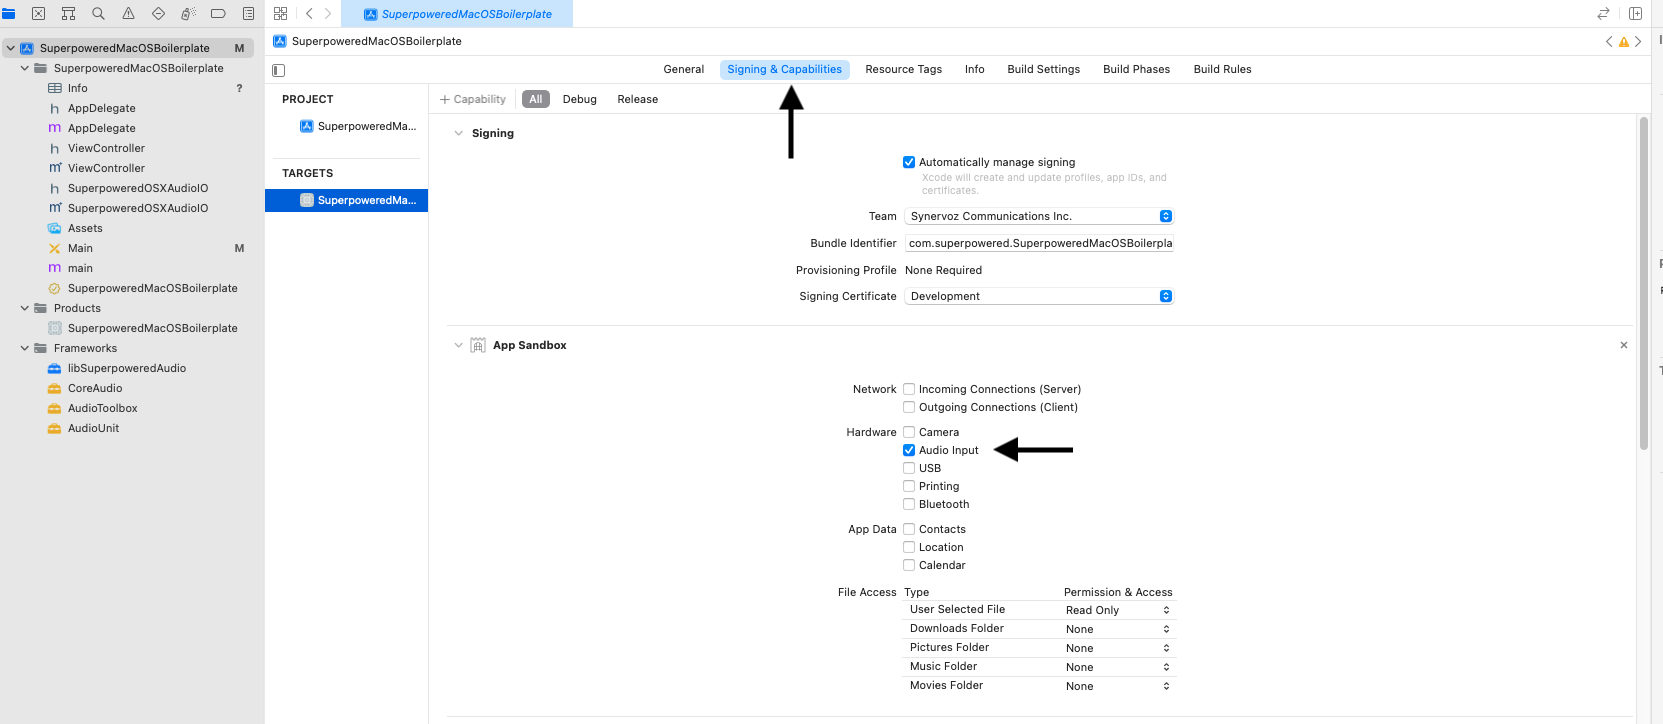
Then scroll down to the Hardened Runtime permissions and add the permission there too.
Initializing Superpowered
Before you can start using Superpowered you need to initialize the library. Import the Superpowered.h header file and call the Superpowered::Initialize function with your license key. Use the evaluation license key found here. Developers who have purchased a license should contact licensing@superpowered.com to obtain license keys for public launch of their projects. The Superpowered.h file is a C++ header so make sure to import it from either a C++ file or an Objective-C++ (.mm extension) file.
#include "Superpowered.h"...Superpowered::Initialize("ExampleLicenseKey-WillExpire-OnNextUpdate");
Integrating Superpowered with macOS audio
To quickly integrate Superpowered with macOS audio you can add the lib/Superpowered/OpenSource/SuperpoweredOSXAudioIO.h and lib/Superpowered/OpenSource/SuperpoweredOSXAudioIO.mm files from the Superpowered SDK package to your project. Press Option + Cmd + A and select both the files, and make sure the project under add to targets is clicked at the bottom of the file selection dialog. The file we're importing implements a class that creates an audio unit and an audio processing callback.
If you plan to use a device's microphone or any audio input, make sure to set the
NSMicrophoneUsageDescriptionvalue in yourInfo.plistfile.
#import "SuperpoweredSimple.h"#import "SuperpoweredOSXAudioIO.h"@interface AudioProcessor ()@end@implementation AudioProcessor {SuperpoweredOSXAudioIO *audioIO;}- (bool)audioProcessingCallback:(float *)inputBuffer outputBuffer:(float *)outputBuffer numberOfFrames:(unsigned int)numberOfFrames samplerate:(unsigned int)samplerate hostTime:(unsigned long long int)hostTime {return false;}- (instancetype)init {if (self = [super init]) {Superpowered::Initialize("ExampleLicenseKey-WillExpire-OnNextUpdate");audioIO = [[SuperpoweredOSXAudioIO alloc] initWithDelegate:(id<SuperpoweredOSXAudioIODelegate>)self preferredBufferSizeMs:12 numberOfChannels:2 enableInput:true enableOutput:true];}return self;}@end
 Javascript
is not supported here.