
Development guide: Capturing audio
Handling audio input is often a requirement. This guide will loop back audio input to the audio output with adjustable volume.
Capturing audio with the help of Superpowered
The SuperpoweredWebAudio class contains a helper function called getUserMediaForAudioAsync for easier audio capturing and ironing out browser differences along the way.
Please note that Web Audio AudioContext and browser audio capture requires a secure context: HTTPS or localhost. User interaction is also required on the page before any audio input can be requested and streamed into the AudioContext. Generally speaking, you'll want to resume the audio context on the user's first interaction.
Within the main application Javascript file, where you created an instance of the Superpowered WebAudio manager (webaudioManager) and AudioWorkletProcessorNode (processorNode), you should request the user microphone with webaudioManager.getUserMediaForAudioAsync(). This will return a MediaStream, which must be passed into a MediaStreamSourceNode allowing audio flowing into our AudioWorkletNode running our own AudioWorkletProcessor script.
async function setupAudioCapture() {// either pass in {'fastAndTransparentAudio': true} for the default soundcard/device with no processing,// or pass in a MediaStreamConstraints object - see https://developer.mozilla.org/en-US/docs/Web/API/MediaStreamConstraintsconst userInputStream = await webaudioManager.getUserMediaForAudioAsync({ 'fastAndTransparentAudio': true });if (!userInputStream) throw Error('no access to user microphone');// create a WebAudio API MediaStreamSourceNode - https://developer.mozilla.org/en-US/docs/Web/API/MediaStreamAudioSourceNodeconst userInputStreamSourceNode = webaudioManager.audioContext.createMediaStreamSource(userInputStream);// if the input is mono, then upmix the mono channel to a stereo node with a WebAudio API ChannelMergerNode// because Superpowered expects stereoconst userInputMergerNode = webaudioManager.audioContext.createChannelMerger(2);// connect the userInputStreamSourceNode input to channels 0 and 1 (L and R)userInputStreamSourceNode.connect(userInputMergerNode, 0, 0); // leftuserInputStreamSourceNode.connect(userInputMergerNode, 0, 1); // right// now we have a stereo audio node (userInputMergerNode) which we can connect to an AudioWorklet Node// connect the stereo microphone stream into our processor stereo inputuserInputMergerNode.connect(processorNode);}
In this example, our AudioWorkletProcessorNode (processorNode) comprises of a single Volume function in processAudio.
import "../Superpowered.js";class UserAudioProcessor extends SuperpoweredWebAudio.AudioWorkletProcessor {// Runs after the constructoronReady() {this.inputGain = 0.5;this.previousInputGain = 0;// Notify the main scope that we're prepared.this.sendMessageToMainScope({ event: "ready" });}// onDestruct is called when the parent AudioWorkletNode.destruct() method is called.// You should clear up all Superpowered objects and allocated buffers here.onDestruct() {// Nothing to clear in this example.}onMessageFromMainScope(message) {if (message.type === "parameterChange") {if (message.payload?.id === "inputGain") this.inputGain = message.payload.value;}}processAudio(inputBuffer, outputBuffer, buffersize, parameters) {// Apply volume while copy the input buffer to the output buffer.// Gain is smoothed, starting from "previousInputGain" to "inputGain".this.Superpowered.Volume(inputBuffer.pointer,outputBuffer.pointer,this.previousInputGain,this.inputGain,buffersize);this.previousInputGain = this.inputGain; // Save the gain for the next round.}}// The following code registers the processor script in the browser, please note the label and reference.if (typeof AudioWorkletProcessor !== "undefined") registerProcessor("UserAudioProcessor", UserAudioProcessor);export default UserAudioProcessor;
We are sending gain control values from our slider input element via the main thread (src/index.js) over the AudioWorket message port like this:
<inputtype="range"min="0"max="1"step="0.01"value="0.5"oninput="onParamChange('inputGain', this.value)"/>
...// the onchange handler on the dom element is bound to the following function in our main applciationonParamChange = (id, value) => {// Here we send the new gain value over to the audio thread to be appliedthis.processorNode.sendMessageToAudioScope({type: "parameterChange",payload: {id,value: Number(value) // we should type cast here}});};...
Capturing system level audio stream with Superpowered is super simple when you use our open-source top level helpers to abstract the differences between platforms.
This guide continues on from the integration guide, so please check that first to get things setup and ready.
The good news is we've got some parts in place for audio stream capture from the integration guide. Please note the enableInput parameter when we initialize our SuperpoweredOSXAudioIO helper.
self.superpowered = [[SuperpoweredOSXAudioIO alloc] initWithDelegate:(id<SuperpoweredOSXAudioIODelegate>)self preferredBufferSizeMs:12 numberOfChannels:2 enableInput:true enableOutput:true];
We also need to grant an OS level permission to the application to access audio input streams. It's done in the application's info.plist file, which is editable in the Info section of application settings in Xcode.

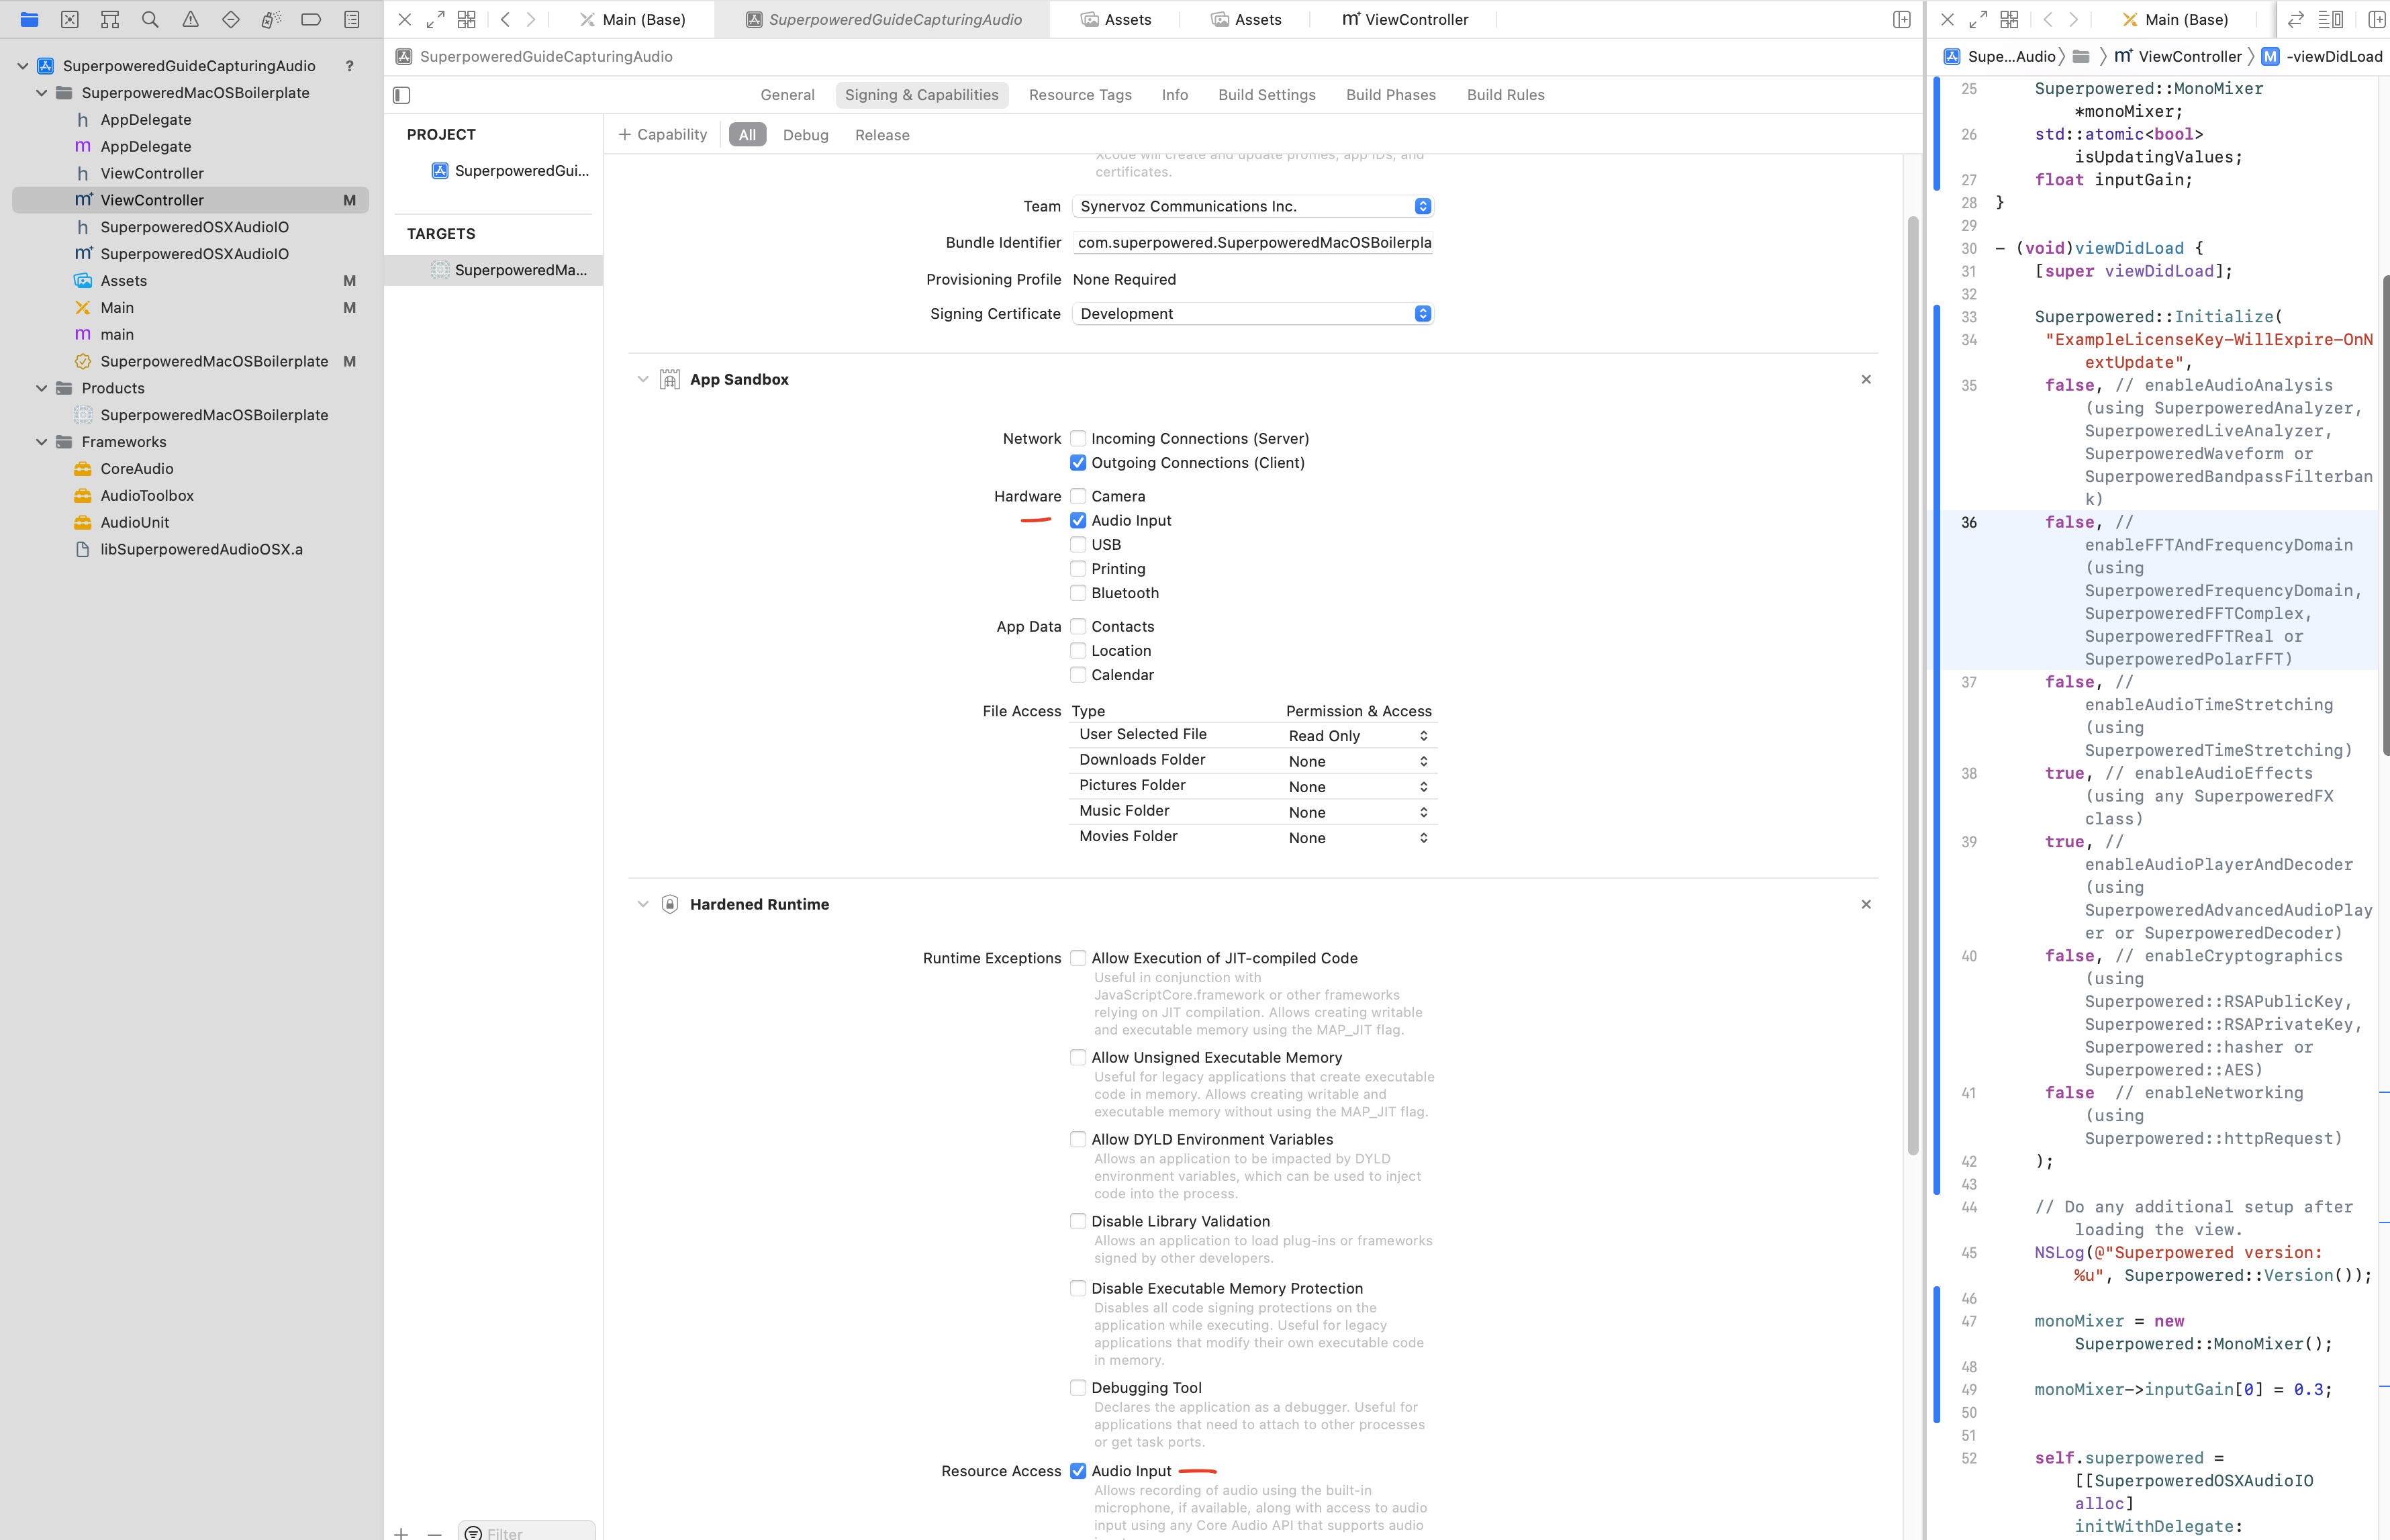
You must also grant the application sandbox and runtime to access audio input with the following two checkboxes in the application's Signing & Capabilities section in Xcode.
Looping back the audio
For the purpose of a simple demonstration, we'll loop the audio input back to the audio output via the Volume utility function. We'll have a simple slider in our UI, adjusting input gain between 0 and 1.
Drag a slider onto the Storyboard, then drag it to the top of the View controller while holding CTRL . Name it inputGainSlider and you should see the following:
...@interface ViewController ()@property (weak) IBOutlet NSSlider *inputGainSlider;@end...@end
Let's declare some variables we'll be using in our ViewController.
@implementation ViewController {float previousInputGain;}
In our viewDidLoad function, we should set the initial gain.
- (void)viewDidLoad {[super viewDidLoad];Superpowered::Initialize("ExampleLicenseKey-WillExpire-OnNextUpdate");NSLog(@"Superpowered version: %u", Superpowered::Version());+ previousInputGain = 0;audioIO = [[SuperpoweredOSXAudioIO alloc] initWithDelegate:(id<SuperpoweredOSXAudioIODelegate>)self preferredBufferSizeMs:12 numberOfChannels:2 enableInput:true enableOutput:true];[audioIO start];}
Reading the audio input stream and applying the volume
The final piece of the puzzle is to read the audio input stream, apply the current gain value and then loop back to the audio output stream to the speakers.
Modify the audioProcessingCallback function to the following:
- (bool)audioProcessingCallback:(float *)inputBuffer outputBuffer:(float *)outputBuffer numberOfFrames:(unsigned int)numberOfFrames samplerate:(unsigned int)samplerate hostTime:(unsigned long long int)hostTime; {// Apply volume while copy the input buffer to the output buffer.// Gain is smoothed, starting from "previousInputGain" to "inputGain".float inputGain = self.inputGainSlider.floatValue;Superpowered::Volume(inputBuffer, outputBuffer, previousInputGain, inputGain, numberOfFrames);previousInputGain = inputGain; // Save the gain for the next round.return true;}
End result
We've created an ES6 style Javascript sandbox for you to try out the code above.
If everything has gone well, you should have a slider that controls the gain of a simple loopback to the speakers.
You can find the example code for this guide and all the others in both JS and native in one repository over at GitHub.
Download the code examples for all the Superpowered guides in both Native and JS.