
Development guide: Loading and playing audio
It's quite likely that in your audio application you might want to load some audio for playback. In this guide we'll take a look at common methods to achieve that with Superpowered.
We'll be using techniques to pass events between threads as shown in the Controlling signals guide.
If you'd like to pick up from this point, you can clone the guide code from here:
Download the code examples for all the Superpowered guides in both Native and JS.
In Javascript, there are two schools of thought when using a third-party library like Superpowered with external audio assets.
You can either load the audio externally outside of Superpowered, then connect an audio source into Superpowered with the Web Audio API to utilize Superpowered's brilliant and efficient DSP abilities. However, with this approach you will not have access to the amazing features of the Superpowered AdvancedAudioPlayer, such as zero player latency. We do not recommend this approach.
The better way is that you let Superpowered handle the audio loading in its entirety which opens up Superpowered's advanced scheduling, time-stretching and transport controls when used in combination with Superpowered's AdvancedAudioPlayer.
This guide demonstrates how to fetch, decode and play audio using Superpowered tools in Javascript.
What we'll build
We'll create a really simple example application that will load a local audio file, and control playback speed. We’ll also show you how to load HLS audio streams in the C++ example.
We'll create a really simple example application that will load a local audio file, and control playback speed. We’ll also show you how to load HLS audio streams.
Creating the UI
We're setting up a simple load button which will trigger the fetching of an external audio file, and three sliders controlling the player volume, playback rate and playback pitch.
<div class="container"><img class="logo" src="/static/images/superpowered-white.svg" /><div class="controls"><h1 class="demoTitle">Loading and playing audio</h1><button id="loadAssetButton" onclick="loadTrack()">Load and play local track</button><h3 id="trackLoadStatus"></h3><div id="bootedControls"><span>Player volume</span><inputtype="range"min="0"max="1"step="0.01"defaultValue="0.5"oninput="onParamChange('localPlayerVolume', Number(this.value))"/><span>Playback rate</span><inputtype="range"min="0.003"max="2"step="0.001"defaultValue="1"oninput="onParamChange('localPlayerRate', Number(this.value))"/></div><span>Playback pitch</span><inputtype="range"min="-1200"max="1200"step="1"defaultValue="0"oninput="onParamChange('localPlayerPitch', Number(this.value))"/></div></div></div>
Just like the previous guide, we're calling onParamChange in our main application when the sliders are moved.
...onParamChange(id, value) {this.processorNode.sendMessageToAudioScope({type: "parameterChange",payload: {id,value}});}...
In Xcode, we have four instances of NSSlider and some text labels in the View Controller Interface Designer. These have been bound to the controller by CTRL, dragging them over to the top of the Controller code as seen with localGain, which is the top slider.
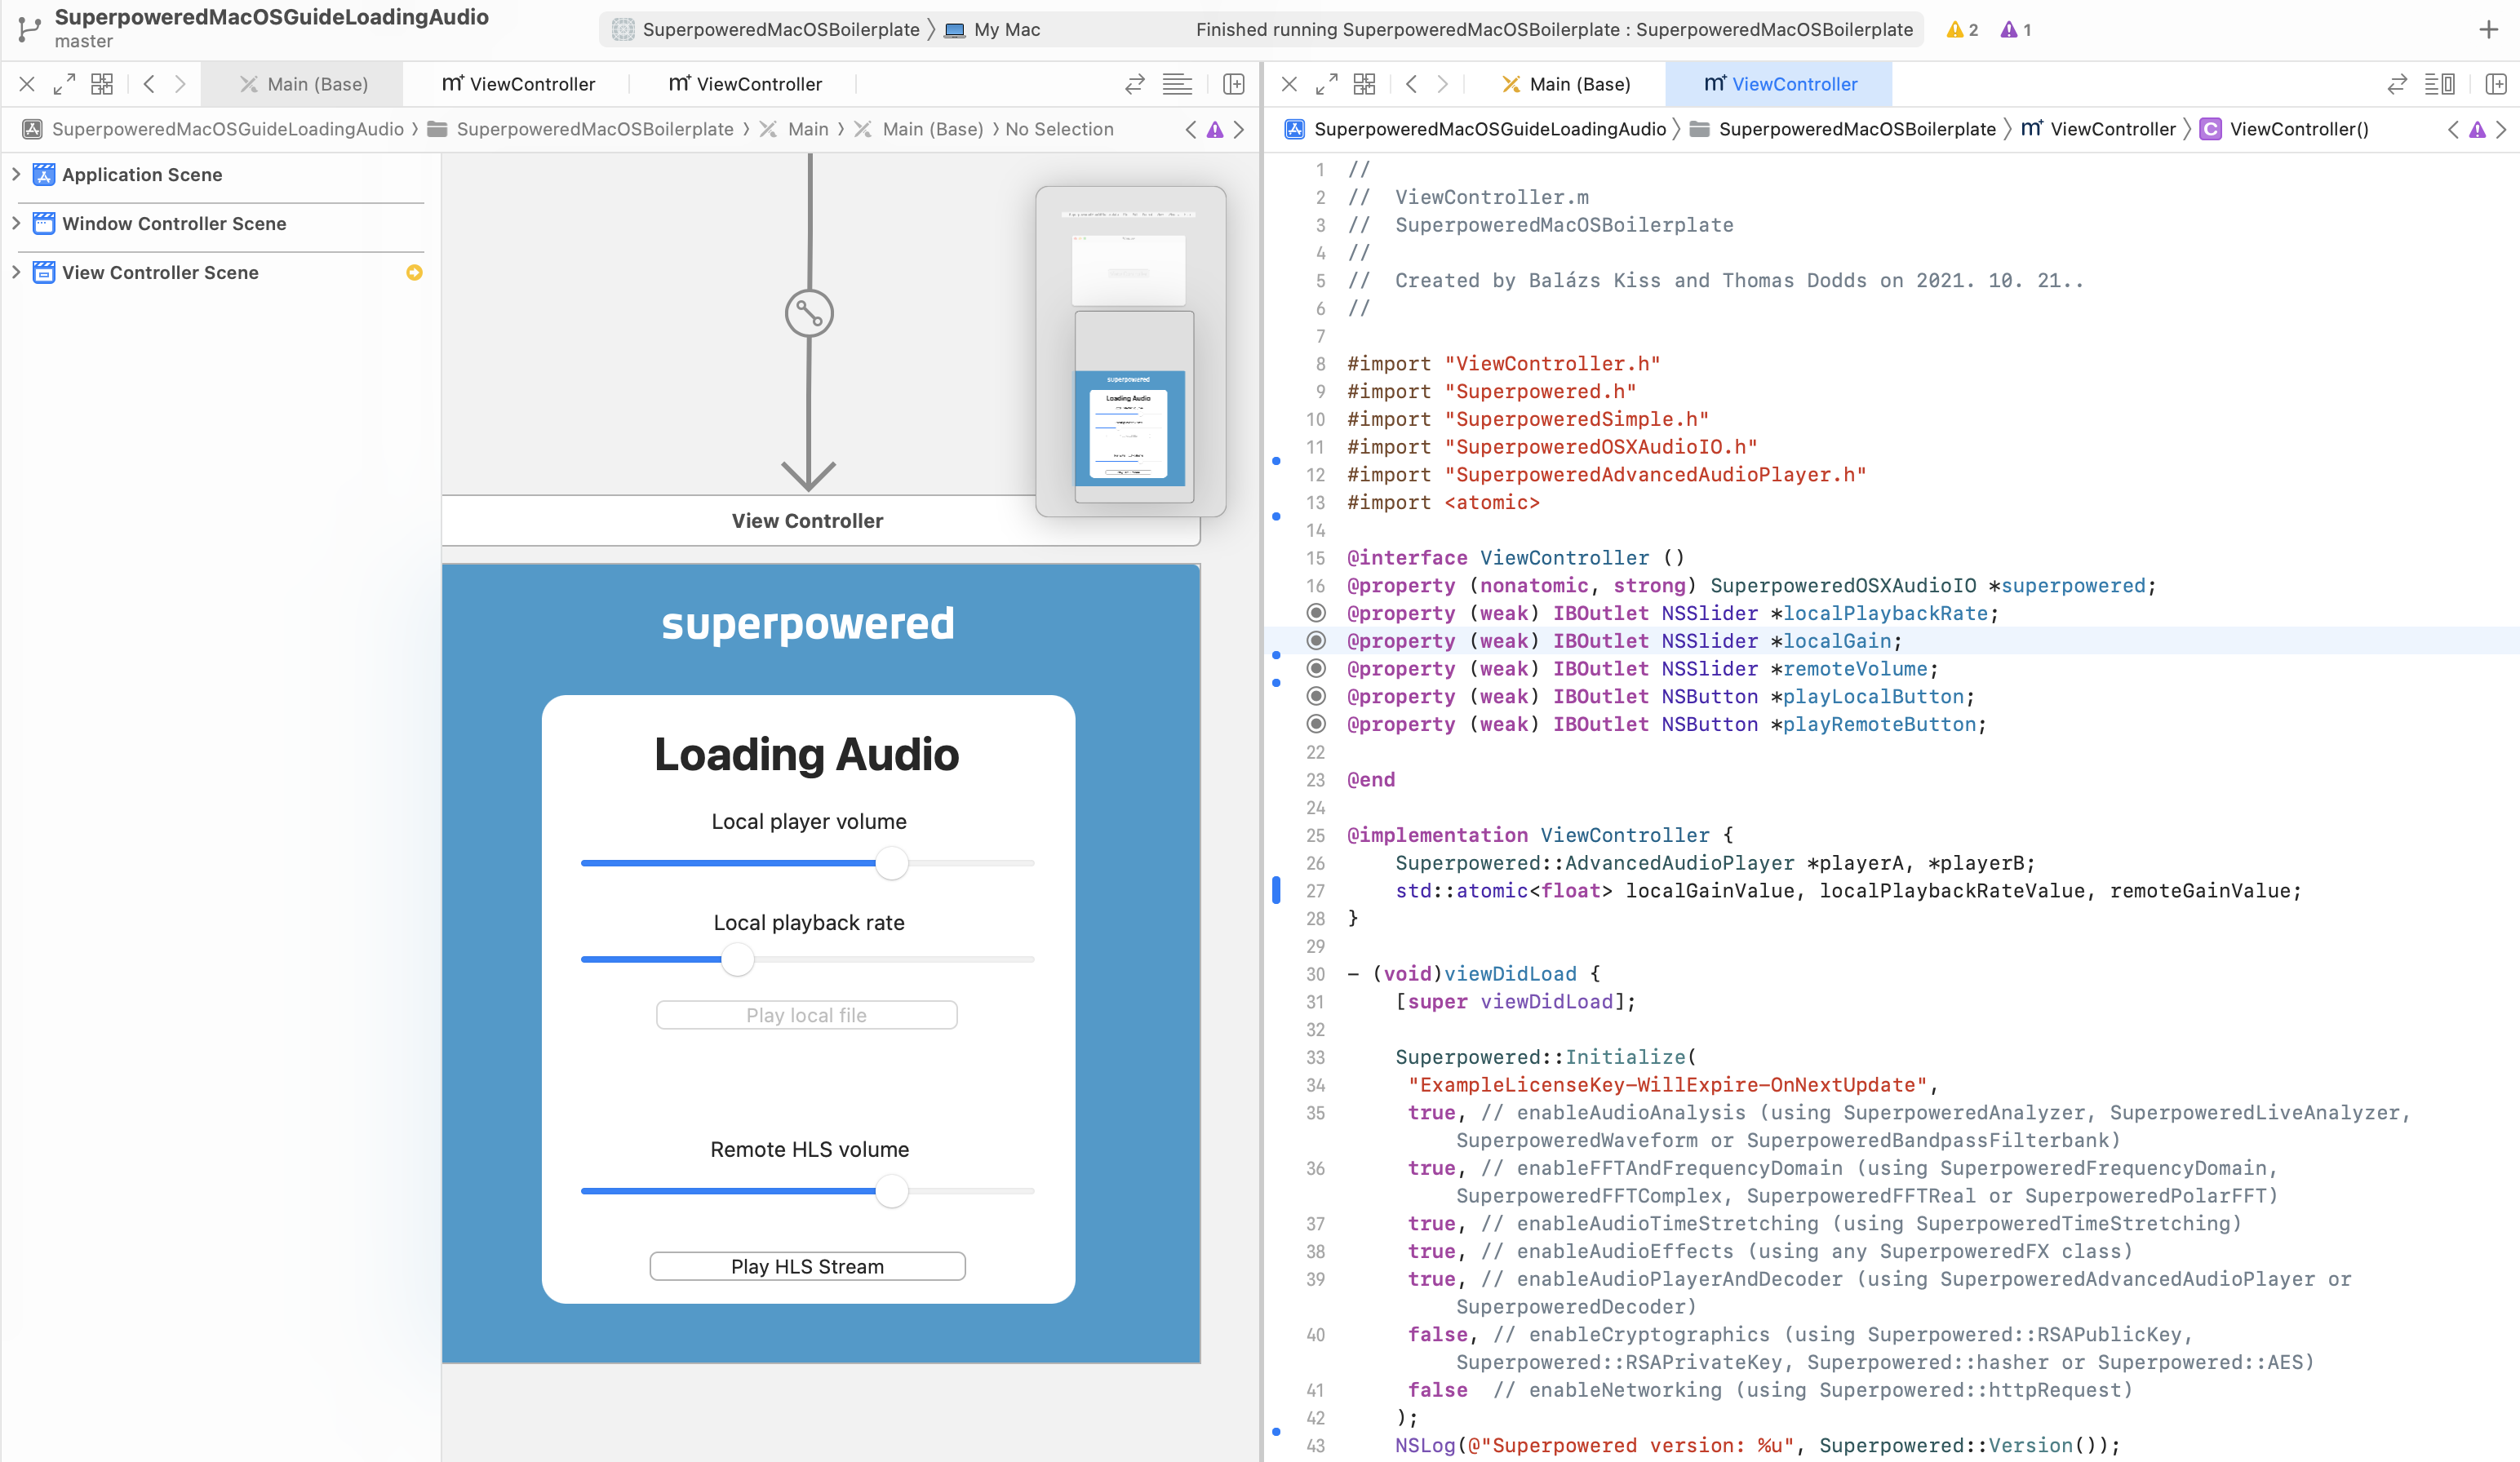
The volume slider minimum and maximum values are 0 and 1. The playback rate is a a little different and ranges from 0.5 to 2, defaulting at 1. The initial enabled state of the controls are set to false, because we'll be enabling them after the content is loaded and ready to play.
Setting up the audio graph
Within our AudioWorkletProcessor, we need to create an instance of a Superpowered Advanced Audio Player. We set the player to loop when it gets to the the end of a file and we also set a gain value which we will update via our UI later.
...// Runs after the constructor.onReady() {this.player = new this.Superpowered.AdvancedAudioPlayer(this.samplerate,2,2,0,0.501,2,false);this.player.loopOnEOF = true;this.playerGain = 1;// Notify the main scope that we're prepared.this.sendMessageToMainScope({ event: "ready" });}...
Our audio processing callback is simple and will generate the output from the Advanced Audio Player, passing the volume in as an argument to it's processStereo function.
processAudio(inputBuffer, outputBuffer, buffersize, parameters) {// Ensure the samplerate is in sync on every audio processing callback.this.player.outputSamplerate = this.samplerate;// Render into the output buffer.if (!this.player.processStereo(outputBuffer.pointer, false, buffersize, this.playerGain)) {// If no player output, set output to 0s.this.Superpowered.memorySet(outputBuffer.pointer, 0, buffersize * 8); // 8 bytes for each frame (1 channel is 4 bytes, two channels)}}
We're going to create two AdvancedAudioPlayer instances in the viewDidLoad method:
// ...// Let Superpowered know where it can store the temporary files used for buffering HLS.Superpowered::AdvancedAudioPlayer::setTempFolder([NSTemporaryDirectory() fileSystemRepresentation]);// Create two instances of the AdvancedAudioPlayer class, which we'll use to play our local and HLS stream.playerA = new Superpowered::AdvancedAudioPlayer(48000, 0);playerB = new Superpowered::AdvancedAudioPlayer(48000, 0);// Open a local file.playerA->open([[[NSBundle mainBundle] pathForResource:@"lycka" ofType:@"mp3"] fileSystemRepresentation]);// Open a remote HLS stream.playerB->openHLS("http://qthttp.apple.com.edgesuite.net/1010qwoeiuryfg/sl.m3u8");playerB->HLSBufferingSeconds = 20;// ...
The AdvancedAudioPlayer provides an easy-to-use interface for loading and playing audio. This class can open audio files from the file system and from the Internet (http/https). If you prefer to directly feed the audio data into the audio player, use the openMemory() and openPCM16AudioInMemory() methods. Some platforms, such as Android, limits how the resource files can be read in you app's package. On these platforms you can still use the platform-provided methods to read in the asset files and pass the data to the audio player using openMemory().
The audioProcessingCallback contains the following:
- (bool)audioProcessingCallback:(float *)inputBuffer outputBuffer:(float *)outputBuffer numberOfFrames:(unsigned int)numberOfFrames samplerate:(unsigned int)samplerate hostTime:(unsigned long long int)hostTime {// Ensure the samplerate is in sync on every audio processing callback.playerA->outputSamplerate = samplerate;playerB->outputSamplerate = samplerate;// Check player statuses. We're only interested in the Opened event in this example.if (playerA->getLatestEvent() == Superpowered::AdvancedAudioPlayer::PlayerEvent_Opened) {// Enable the UI elements for player A. Apple requires UI updates on the main thread.[self performSelectorOnMainThread:@selector(enableUIForPlayerA) withObject:nil waitUntilDone:NO];};if (playerB->getLatestEvent() == Superpowered::AdvancedAudioPlayer::PlayerEvent_Opened) {// Enable the UI elements for player B. Apple requires UI updates on the main thread.[self performSelectorOnMainThread:@selector(enableUIForPlayerB) withObject:nil waitUntilDone:NO];// Fast forward in the stream a bit.playerB->setPosition(6000, true, false);};// Store the output of player A into outputBuffer.bool silence = !playerA->processStereo(outputBuffer, false, numberOfFrames, localGainValue);// If silence, then player B may overwrite the contents of outputBuffer.// If no silence, then player B may mix its output with the contents of outputBuffer.if (playerB->processStereo(outputBuffer, !silence, numberOfFrames, remoteGainValue)) silence = false;return !silence;}
Loading the audio and handling events
We need to handle the loading of the audio when the button is clicked. The button calls the loadTrack function in the main application.
Superpowered helps you to download and convert audio into the AudioInMemory format required for Superpowered. Under the hood it uses a Superpowered Decoder, which offers the following consistent codec support across all devices and web browsers:
- Stereo or mono pcm WAV and AIFF (16-bit int, 24-bit int, 32-bit int or 32-bit IEEE float).
- MP3: MPEG-1 Layer III (sample rates: 32000 Hz, 44100 Hz, 48000 Hz). MPEG-2 Layer III is not supported (mp3 with sample rates below 32000 Hz).
- AAC or HE-AAC in M4A container (iTunes) or ADTS container (.aac).
It will automatically create a dedicated Worker to download and decode the remote data, so it does not put any work on the thread from which it was called. This is a clear performance advantage over the standard WebAudio API decodeAudioData pattern. The downloadAndDecode helper can be called from the main scope or from inside a Superpowered AudioWorklet.
For an example of downloading and decoding an audio asset inside a Worker, please see Loading audio from within a Worker
...loadTrack() {this.trackLoadingStatusRef.innerHTML = "Downloading and decoding track...";this.webaudioManager.audioContext.resume();const loadedCallback = this.processorNode.sendMessageToAudioScope.bind(this.processorNode);this.Superpowered.downloadAndDecode("/static/audio/lycka.mp3",loadedCallback);}...
The callback we've provided will send the loaded event over to the AudioWorkletProcessor via the message port. We're also using this message port to handle parameter changes from our sliders above. Let's take a look at how these various types are handled:
...onMessageFromMainScope(message) {if (message.type === "parameterChange") {if (message.payload.id === "localPlayerVolume") this.playerGain = message.payload.value;else if (message.payload.id === "localPlayerRate") this.player.playbackRate = message.payload.value;else if (message.payload.id === "localPlayerPitch") this.player.pitchShiftCents = message.payload.value;}if (message.SuperpoweredLoaded) {this.player.pause();this.sampleLoaded = true;this.player.openMemory(this.Superpowered.arrayBufferToWASM(message.SuperpoweredLoaded.buffer),false,false);this.player.seek(0);this.player.play();this.sendMessageToMainScope({ event: "assetLoaded" });}}...
Then we need to handle the assetLoaded event within the main application thread, so we can show the UI controls for the player.
...onMessageProcessorAudioScope(message) {if (message.event === "ready") {// The processor node is now loaded}if (message.event === "assetLoaded") {this.loadAssetButtonRef.style.display = "none";this.playerVolumeRef.disabled = false;this.playerSpeedRef.disabled = false;this.playerPitchRef.disabled = false;this.trackLoadingStatusRef.style.display = "none";}}...
Starting playback and applying changes
audioProcessingCallback runs in a real-time audio thread. After a player is finished loading, it will call to the following functions on the main thread:
- (void)enableUIForPlayerA {self.playLocalButton.enabled = true;self.localPlaybackRate.enabled = true;self.localPlaybackPitch.enabled = true;self.localGain.enabled = true;}- (void)enableUIForPlayerB {self.playRemoteButton.enabled = true;self.remoteVolume.enabled = true;}
The play buttons on the UI are bound to the controller with playLocalAudio and playRemote.
- (IBAction)playLocalAudio:(id)sender {playerA->togglePlayback(); // play/pause}- (IBAction)playRemote:(id)sender {playerB->togglePlayback(); // play/pause}
The sliders are all bound to one method called updateParams, setting local variables used in the controller's audioProcessingCallback and some player properties too. You'll notice the localGainValue and remoteGainValue are passed into the AdvancedAudioPlayers's processStereo method as the volume parameters.
- (IBAction)updateParams:(id)sender {// Set some player properties.// This function is called on the main thread and can concurrently happen with audioProcessingCallback, but the Superpowered AdvancedAudioPlayer is prepared to handle concurrency.// Values are automatically smoothed as well, so no audio artifacts can be heard.playerA->playbackRate = self.localPlaybackRate.floatValue;playerA->pitchShiftCents = self.localPlaybackPitch.floatValue;// Save the volume values, because those are not player properties.localGainValue = self.localGain.floatValue;remoteGainValue = self.remoteVolume.floatValue;}
End result
We've created the following sandbox for you to experiment with.
If you've followed the guide and set things up correctly, you should see something like the following when you build and run:
You can find the example code for this guide and all the others in both JS and native in one repository over at GitHub.
Download the code examples for all the Superpowered guides in both Native and JS.